Tired of that worn-out dresser? Let’s read how to give your old furniture a makeover with chalk paint.
A few years ago, my grandmother’s old wardrobe was sitting in our garage, covered in dust. The wood was scratched, the color had long faded, and one of the legs was ofcause shaky.
Most people would’ve discareded without thinking twice. But I couldn’t.
It wasn’t just furniture, it was part of her story. She used to keep her scarves and her old love letters from grandpa in it. Every time I looked at it, I thought of her.
Still, I didn’t know how to fix it. I wasn’t a carpenter or a furniture expert. I didn’t even own power tools.
But, myself and my mind knew I wanted to keep it and I wanted it to look beautiful again, just like the cute smile on her face.
As curious as a cat, I stumbled on chalk paint.
I had no idea what chalk paint before then. I just saw a photo online of someone transforming an old chair with it.
No sanding. No stripping. Just painting. The finish looked soft, smooth, and slightly vintage. I couldn’t believe it was that simple.
So I gave it a try.
And to this day, that wardrobe is one of my favorite things in my home. I painted it a soft cream color, added new handles, and placed it in my bedroom.
Not only does it look beautiful, it carries grandma’s memory with it. It feels like a little piece of her still lives here with me, in the most ordinary and comforting way.
Chalk paint didn’t just refresh the furniture. It helped me reconnect with something I almost want to lose.
So what makes chalk paint so special?
If you’ve ever looked at an old piece of furniture in your home, maybe a dresser that’s past its prime or a nightstand that’s seen better days, and wondered how to bring it back to life without spending hundreds or hiring someone, chalk paint might be your answer.
It’s a type of paint that sticks to nearly any surface without needing much prep. You just clean the furniture, paint it, and that’s it.
It dries quickly, it’s easy to work with, and the finish is soft and matte, giving that fine look that feels both vintage and fresh.
The real magic of chalk paint gives people like you and me, the non-professionals, the memory-keepers, the sentimental DIY-ers, a way to breathe life back into things that matter to us.
In this post, I’ll walk you through exactly how to use chalk paint to give your old furniture a makeover.
Because sometimes, saving something old another meaningful kind of makeover there is.
The Beginner’s Guide to Painting Furniture with Chalk Paint
Thinking about giving that old dresser or side table a fresh look but nervous about messing it up? You’re not alone
I was exactly where you are. I had no experience with paint, no fancy tools, and no clue where to start.
But chalk paint made it surprisingly easy, even for someone who had never painted furniture before.
Let’s walk through things you need to know.
What Is Chalk Paint (and Why It’s Different from Regular Paint)?
Chalk paint is a special kind of paint that gives furniture a soft, matte, slightly chalky finish. It’s known for being thick, and very easy to use.
It was created by designer Annie Sloan, and it’s become a go-to for people who want to refresh old furniture without the headache.
Here’s how it’s different from regular paint:
- No sanding or priming required in most cases.
- Dries fast (you can usually recoat in under an hour).
- Works on almost any surface like wood, laminate, metal, even fabric.
- Leaves a vintage-style, matte finish that hides imperfections.
- Easy to distress if you want a rustic, shabby-chic look.
Chalk paint is low effort, but still makes a beautiful impression.
Best Surfaces to Use Chalk Paint On

One of the best things about chalk paint is its flexibility. It works well on:
- Wood (painted or unpainted, raw or stained)
- Laminate furniture (like IKEA or particleboard pieces)
- Metal (great for chair legs, handles, or frames)
- Glass (for decorative jars or mirror frames)
- Even fabric (for chairs and cushions, though that’s a little advanced)
If it’s not peeling, greasy, or soaking wet, you can probably chalk paint it.
Chalk Paint Supplies You’ll Need
You don’t need a big budget or power tools. Here’s what to gather before you begin:
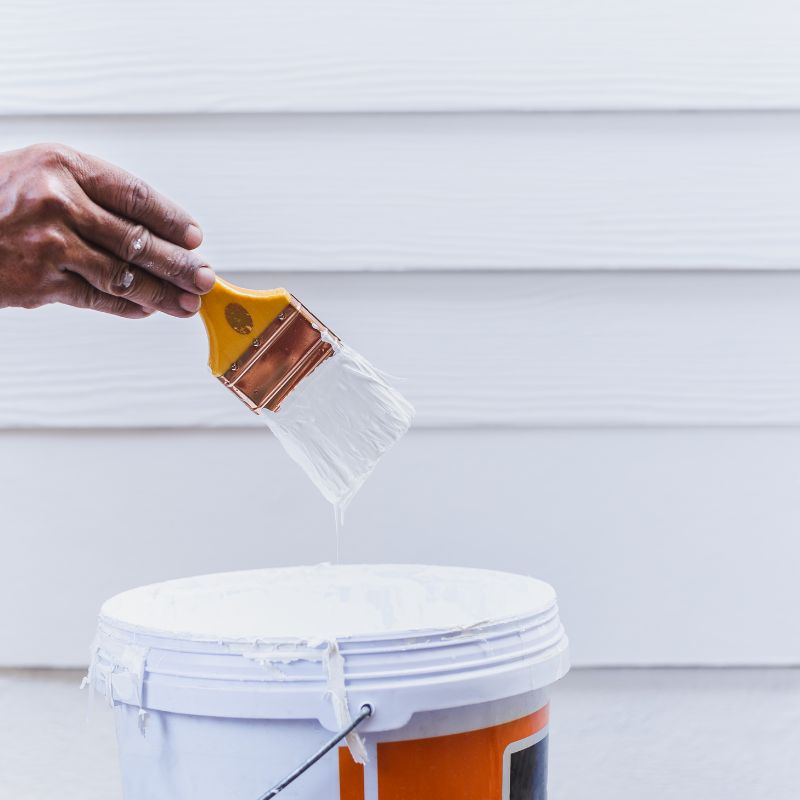
✅ Chalk paint (a little goes a long way)
✅ A chalk paint brush or any soft-bristle paintbrush
✅ Clean cloth or rag (for wiping dust or cleaning)
✅ Mild soap and water (to clean furniture before painting)
✅ Optional: painter’s tape (for clean edges)
✅ Optional: wax or clear topcoat (to seal the paint)
✅ Optional: sandpaper (for light distressing or smoothing out chips)
No need to go overboard, this is a low-stress DIY. Even one brush and one can of paint can take you far.
Step-by-Step: How to Paint Furniture with Chalk Paint
Let’s break it down:
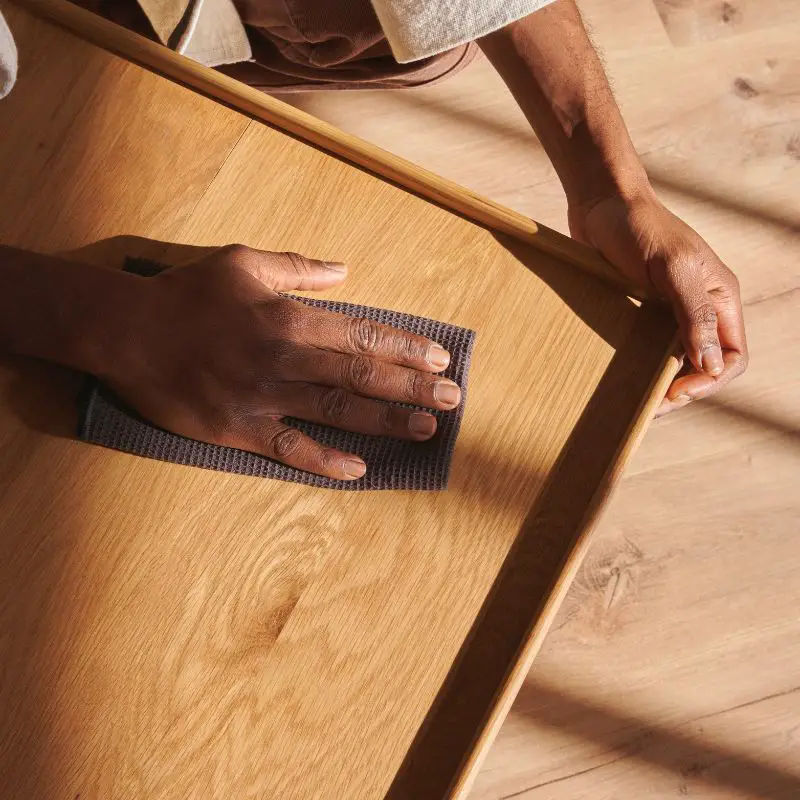
Step 1: Clean your furniture
Use a damp cloth and gentle soap to wipe off any dirt, grease. Let it dry completely.
Step 2: Tape off areas (optional)
Use painter’s tape to cover edges, drawers, or anything you don’t want painted. This keeps it neat.
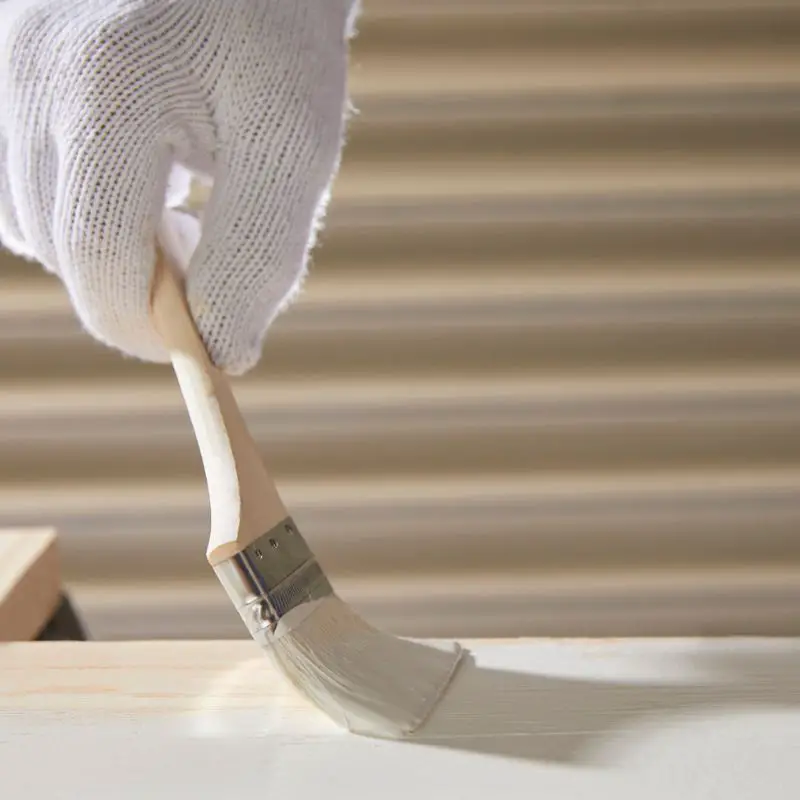
Step 3: Start painting
Dip your brush lightly into the paint.
Don’t overload it.
Use smooth strokes, going with the grain of the wood (if visible).
The first coat may look streaky or thin, that’s normal. Let it dry for 30–60 minutes.
Step 4: Apply a second coat
Once the first coat is dry, apply a second coat. This is when the magic happens. You’ll see full coverage and smooth color.
Step 5: Let it cure
After painting, let your furniture sit for a day before sealing it. This gives the paint time to set.
Sealing with Wax or Topcoat
Chalk paint dries to a lovely matte finish, but it’s a little delicate on its own.
To protect your piece, especially if it will be touched or used daily, you’ll want to seal it.
You have two main options:
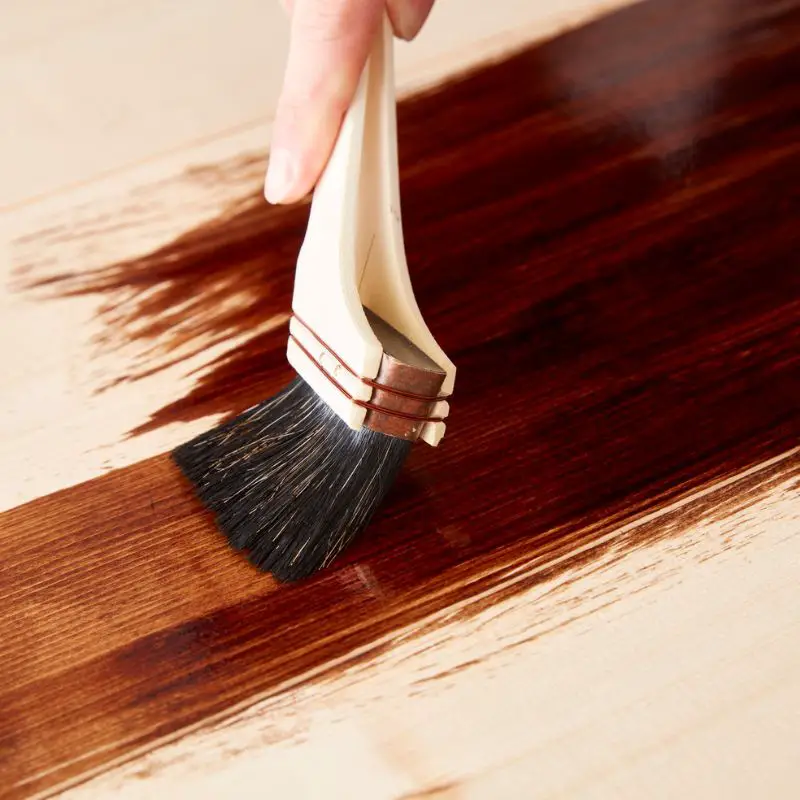
Furniture wax – This gives a soft, natural finish. Rub it in with a cloth or brush, let it dry, then buff it out. It takes a bit of elbow grease but looks gorgeous.
Clear water-based topcoat – This is easier to apply and dries quicker. Use a sponge or brush to apply a thin coat.
It gives more durable protection, great for kitchen tables, drawers, or kids’ furniture.
If you want that old, vintage look, try using dark wax after your clear wax. It gives furniture an aged, antique style.
Chalk Paint Furniture Ideas to Inspire Your Next Project
If you’re staring at a tired piece of furniture in your home, maybe a scratched nightstand, an old dresser, or a dining chair that’s lost its charm, and wondering what to do with it.
One of the most rewarding things you can learn is how to give your old furniture a makeover with chalk paint.
It’s budget-friendly, beginner-friendly, and honestly kind of fun once you get started.
But sometimes the hardest part isn’t the painting, it’s figuring out what look you’re going for.
So here are some easy, inspiring ideas to help you choose the right colors, styles, and pieces for your next chalk paint project.
Color Palette Ideas That Work Every Time
Chalk paint comes in so many beautiful colors that it’s easy to get overwhelmed. Start with how you want the furniture to feel, soft and calming, bold and modern, or maybe something vintage and layered.
- Soft Neutrals: These are great for almost any room. Think warm whites, light greys, creams, soft taupes, and sage green. They make furniture feel clean, and calm, without being boring.
- Bold Tones: If you want your piece to be the star of the room, go for colors like navy, charcoal, deep teal, mustard yellow, or even blush pink. These colors look amazing with brass hardware or gold accents.
- Layered Effects: This is where you paint one color over another, then lightly sand through the top layer to reveal the color underneath
If you’re nervous, start with a small test piece like a wooden tray or stool. It helps you get used to the color and brush strokes before committing to a big piece.
Styling Ideas for Different Rooms
Knowing how to give your old furniture a makeover with chalk paint can help you refresh your entire home, one room at a time.
Here are some creative ways to use painted pieces in different spaces:
- Kitchen: Paint your old buffet table in a warm navy or olive green.
Add some matte black handles, and you’ve got a stylish statement piece. Or try painting bar stools in soft grey for a cozy farmhouse vibe.
- Nursery: Soft pastels like mint, blush, or ivory work beautifully on baby dressers, toy chests, or bookshelves.
You can even use decals of stars or animals for extra sweetness.
- Home Office: Do you have a boring old desk? Paint it a deep green or charcoal to give it new life. Add modern hardware and pair it with an upholstered chair.
- Entryway: A chalk-painted bench or narrow console table in a calming neutral color (like dove grey or soft blue) makes your entry feel warm and inviting.
Popular Furniture Pieces That Transform Beautifully

Not sure which piece to start with? These are some of the easiest and most rewarding items to transform with chalk paint:
- Nightstands: They’re small, easy to handle, and make a big difference beside your bed. Perfect for beginners.
- Buffets & Sideboards: These become statement pieces, especially in dining rooms or hallways.
- Desks: An old writing desk can feel brand new with just a coat of paint and some updated knobs.
- Dressers: Ideal for layering colors, adding new handles, or even stenciling drawer fronts for a one-of-a-kind look.
- Chairs: Wooden chairs, especially ones with spindles or detail, take chalk paint really well. You can distress them easily to bring out those carved edges.
Where to Find Furniture Worth Painting
If you don’t have an old piece at home, don’t worry, you can find plenty of hidden gems if you know where to look:
- Thrift Stores: Check local secondhand shops. Even if something looks ugly now, try to focus on the shape and durability. Chalk paint can fix almost anything else.
- Facebook Marketplace: This is a goldmine for low-cost furniture. Look for real wood pieces, they hold up better and paint beautifully.
- Garage Sales: You’d be surprised what people give away. Sometimes a little cleaning and paint is all a piece needs to shine again.
Low Budget Chalk Paint Makeover
Furniture makeovers can look expensive, especially when you scroll past those perfect before-and-after photos.
But the truth is, you don’t need a big budget to make something old feel brand new again. You just need a bit of creativity, the right supplies, and a few smart tricks.
This guide is all about how to give your old furniture a makeover with chalk paint, without draining your wallet.
Best Affordable Chalk Paint Brands (and Where to Find Them)
Not all chalk paints are priced the same, and you don’t have to go for the expensive cans to get beautiful results.
Here are a few budget-friendly brands that actually work great:
- Waverly Chalk Paint – Available at Walmart and very affordable It covers well and comes in lots of colors.
- FolkArt Home Decor Chalk Paint – You’ll find this at craft stores like Michaels or Hobby Lobby. It’s often on sale or you can use store coupons.
- Rust-Oleum Chalked – A bit more for bigger pieces, but still budget-friendly and covers a lot of surface. Found at hardware stores or online.
- KILZ Chalk Style Paint – Great coverage, found at Home Depot or online.
Repurpose What You Already Have at Home
Before you buy anything new, take a walk around your house. You’d be surprised at what you already have that can double as supplies:
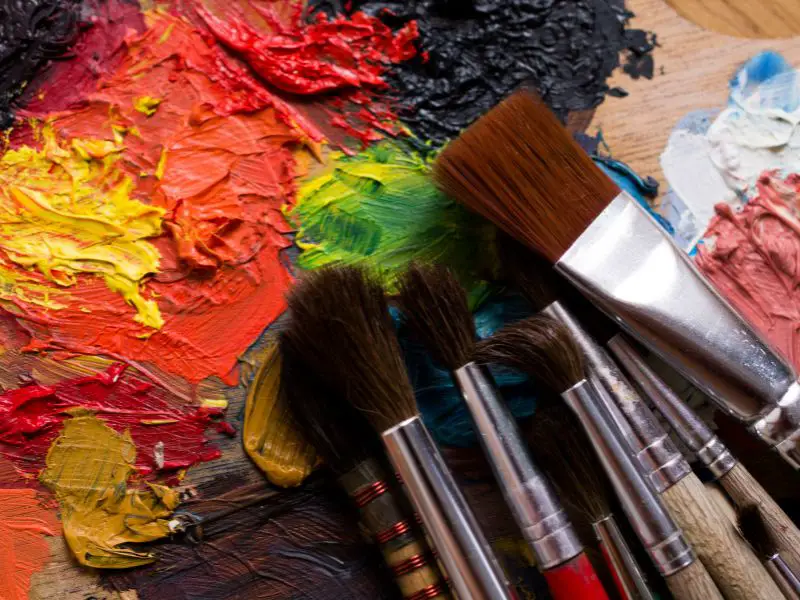
- Old paintbrushes – As long as the bristles aren’t too stiff, they’ll work just fine for chalk paint.
- An old sheet or shower curtain – Use it as a drop cloth to protect your floors.
- Plastic containers – Great for pouring small amounts of paint to work with.
- Mason jars or old cups – Can be used for water and cleaning brushes between coats.
The goal here isn’t perfection, it’s personality. Chalk paint is super forgiving and even adds charm when it’s not flawless.
Upcycling vs. Buying New
One of the best things about learning how to give your old furniture a makeover with chalk paint is realizing you don’t have to buy new stuff all the time.
That old nightstand in your garage? It has more potential than you think. That hand-me-down coffee table? It just needs some love and a layer of paint.
Chalk paint makes it possible to turn trash into treasures, and every makeover tells a little story.
Plus, upcycling:
- Saves money
- Keeps furniture out of landfills
- Lets you create something unique, something you designed
Caring for and Maintaining Your Chalk-Painted Furniture
So, you finally did it. You learned how to give your old furniture a makeover with chalk paint, and now that once-forgotten piece is one of the best parts of your home.
But what happens next? How do you take care of it so it keeps looking good for years?
Chalk-painted furniture doesn’t need a ton of maintenance, but it does need a little love.
In this guide, I’ll show you how to clean it properly, protect the finish, and fix small things like chips and scratches, without making it feel like a big deal.
How to Clean and Protect It (The Right Way)
Chalk paint has a soft, matte look that makes furniture feel cozy and vintage, but it also means you need to be gentle when cleaning.
Here’s what works best:
- Dust it regularly using a dry microfiber cloth or a soft feather duster. Keeping dust off helps prevent small scratches or buildup.
- Wipe with a damp cloth if there’s a spill or smudge, but avoid soaking it. Chalk-painted surfaces don’t like too much water. Just use a damp cloth, not wet and wipe gently.
- Avoid harsh cleaners like bleach or spray polish. They can damage the paint or break down your wax or topcoat finish. If you need a little extra cleaning power, just mix mild dish soap with water.
If your piece is in a busy area like a kitchen or hallway, protect the top surface with a tray, placemat, or decorative cloth to keep scratches and spills to a minimum.
When to Re-Wax or Touch Up the Finish
If you sealed your furniture with wax (which most people do with chalk paint), it will eventually wear down, especially on surfaces that get a lot of use, like tabletops or dresser tops.
Here’s how to know when it’s time to re-wax:
- Does the surface look dull or dry? That’s usually your first sign.
- Is the paint starting to look chalky or powdery again? A fresh coat of wax will bring back that soft, smooth feel.
- Has water started soaking into the surface instead of beading up? That means your wax protection has worn off.
To re-wax:
- Make sure the surface is clean and dry.
- Use a soft cloth or wax brush to rub a thin layer of wax in circles.
- Let it sit for a few minutes, then buff gently with a clean cloth until it feels smooth.
You don’t need to strip off the old wax. Just apply a new layer right on top.
How to Fix Chips or Scratches Over Time
Even with good care, life happens. Kids, pets, moving furniture around, scratches and small chips are bound to show up.
But you know chalk paint is super forgiving. Fixing little marks is easy and doesn’t require starting from scratch.
For small scratches or chips:
- Use a small artist brush or sponge to dab a little paint right into the spot.
- Let it dry, then lightly wax over the area if needed.
- If the scratch is deeper, you might need to sand lightly first to smooth it out before touching up the paint.
For bigger wear areas:
- Sometimes, repeated wear on things like chair arms or drawer handles gives the piece a natural, distressed look, which can actually make it look better!
- But if you want it looking fresh again, just repaint that section, let it dry, and reapply your wax or topcoat.