
How To Make Your Own Throw Pillows And Curtains
In this post, you will learn how to make your own throw pillows and curtains for a custom look.
I’ll admit it: I was intimidated when I first decided to make my own throw pillows and curtains. I mean, who was I even kidding?
I could barely thread a needle without holding my breath and turning my eyes.
But I had this vision of my living room looking a little more, a little softer, and a little closer to my mom’s taste.
She always had this magic way of making any space feel like a hug, and I wanted that.
So I did what anyone does, I went store to store, flipping through overpriced options and patterns but nothing felt personal.
Nothing made me think, this belongs in my space.
Everything was either too perfect or too basic just not the vibe I wanted.
That’s when the idea hit me: why not just make them myself? The worst-case scenario? I’d mess up a few times.
But then, I would finally create something that felt like home.
With zero experience and a whole lot of curiosity, I watched a couple of YouTube tutorials and started small, cutting fabric, learning basic stitches, and figuring out which fabrics hold shape best and which ones drape beautifully.
It wasn’t nearly as hard as I expected. And once I finished the very first pillow, I couldn’t stop.
By the time I hung the curtains, the room felt completely different. Not just prettier, warmer. More me. More ours (mom and I)
It reminded me of the home I grew up in, with all those little handmade touches that made every corner feel thoughtful.
And that’s what I want for you, too. If you’ve never touched a sewing machine in your life or you’ve got a little DIY fire in you, I’ll walk you through some steps.
Let’s get started.
HOW TO MAKE YOUR OWN THROW PILLOWS AND CURTAINS FOR A CUSTOM LOOK
1. How to Make Customized Throw Pillows
Making your own throw pillows is one of the easiest ways to give your space a fresh, personal touch. If you want something bold and colorful or soft and cozy, it all starts with the right fabric and a few basic tools.
Let’s walk through everything step by step.
-
Choosing the Right Fabric
The fabric you choose plays a big role in how your pillow turns out, both in how it looks and how it feels. Some materials are great for a soft, relaxed vibe, while others feel more fancy or polished. Here are a few good options:
- Cotton: Lightweight, breathable, and super easy to sew, perfect for beginners.
- Linen: Gives a more natural, airy look, great for neutral or rustic decor.
- Velvet: Adds a rich, elegant feel, perfect for cozy or glam spaces.
- Faux Fur: Great for texture and warmth, ideal in colder seasons.
- Outdoor Fabric: Strong, water-resistant, and great for patios or high-traffic areas.
Before buying, ask yourself, Will this fabric hold up well in my space? If you have kids or pets, go for something durable and washable.
And always try to match or contrast your fabric with other colors in the room for a balanced look.
-
Tools and Materials You’ll Need
You don’t need a huge list to get started. Here are the basics:
If you’re sewing:
- Fabric of your choice
- Pillow insert (or stuffing)
- Fabric scissors
- Thread to match your fabric
- Sewing machine (or a needle for hand-stitching)
- Pins or clips
- Zipper or velcro (optional, for closure)
Not sewing:
- Fabric glue or fusible fabric tape
- Iron (for tape method)
- Velcro dots or no-sew zipper (optional)
If you’re brand new to DIY projects, try the envelope-style pillow first. It’s the easiest to make and doesn’t require any zippers or hand-stitching.
2. Step-by-Step Guide: Making Your Throw Pillow

Step 1: Measure and Cut Your Fabric
Start by measuring your pillow insert (e.g., 18×18 inches).
Cut two pieces of fabric that size, adding 1 inch on each side for seam allowance.
So for an 18×18 insert, cut two 19×19 fabric squares.
Step 2: Sew or Glue the Edges
Place the fabric pieces right sides together (the side you want showing should be facing inward).
Sew or glue around three sides. If you’re sewing, keep a ½-inch seam.
Leave one side open so you can insert the pillow.
Step 3: Turn Inside Out & Insert Pillow
Flip the fabric inside out so the nice side shows, and gently push out the corners.
Then stuff the pillow insert inside.
Step 4: Close the Pillow
You’ve got a few options here:
- Envelope style: Overlap the back pieces and stitch the top edge, no zippers needed.
- Zipper: Sew a zipper into the open side before inserting the pillow.
- Hand-stitch or glue: Simply seal the last side closed with needle and thread or a line of fabric glue.
3. How to Make Throw Pillows Look Nice

Now that you know how to make your own throw pillows and curtains, the next step is figuring out how to style those pillows so they actually look good in your space.
A few simple styling tricks can help your pillows stand out while still feeling natural and comfortable.
-
Playing with Color and Patterns
Choosing the right colors and patterns is like choosing the outfit for your room, it sets the mood and tone.
When you’re working with throw pillows, they’re small enough that you can be bold without overwhelming the space. Here’s how to get it right:
- Start with a base color from your existing room decor, like your curtains, rug, or wall paint. This makes the whole space feel more connected.
- Use a mix of solids and patterns to create balance. If your curtains are already patterned, go with mostly solid pillows and just one or two with a bold design to avoid a clash.
- Add texture, think linen, velvet, knits, or embroidered details. Even if your color palette is neutral, texture can keep it interesting.
If you’re unsure about color combinations, go with the 60-30-10 rule. 60% of the room is your main color, 30% is a secondary shade, and 10% is your pop of color like a bright or patterned pillow.
-
Pillow Arrangement and Styling
Once you’ve made your pillows, how you arrange them really matters. If you just toss them around, they can look messy.
But if you arrange them with care, they’ll make your space look stylish and cozy.
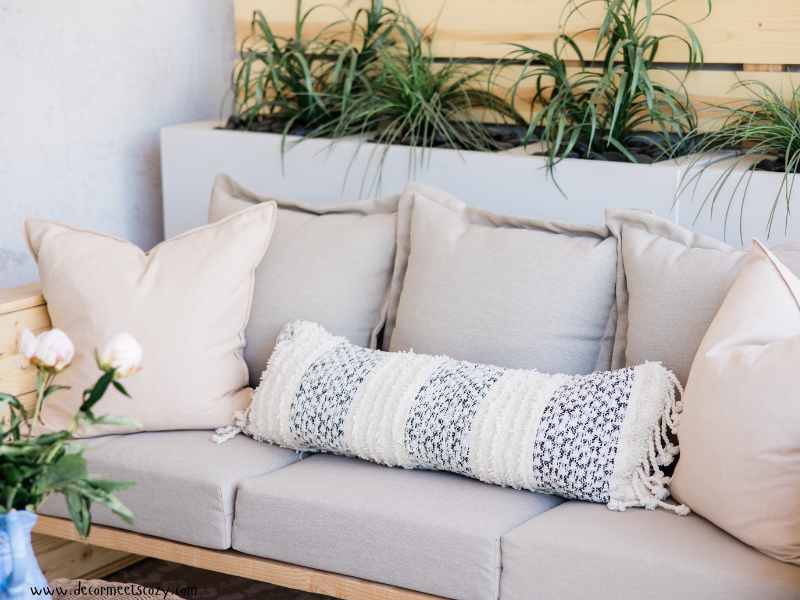
- Layer your pillows: Start with the big ones at the back (like 22” or 20” square ones).
- Then place medium-sized pillows (18”) in front, and finish with smaller ones like lumbar or round pillows.
- Try symmetry: Want a neat and tidy look? Put matching pillows on each side of your couch or bed, and place one fun pillow in the middle to tie it all together.
- Go for a casual look: Mix different pillow shapes like square, round, and long (bolster) pillows. It’ll give your space a more relaxed and modern feel.
Don’t just toss your pillows in a corner. Give them a little fluff, then do the “karate chop” (a soft chop in the middle top of the pillow) to give them that high-end look with a casual twist.
-
Fabric Care and Maintenance
Once you’ve put all that love into making and styling your pillows, the last thing you want is for them to start looking worn out after a few weeks.
Good maintenance makes a huge difference in keeping them looking their best.
- Know your fabric. If you’re using cotton or linen, these are usually machine washable, just remove the cover and wash on cold, then air dry.
Velvet and faux fur, though, often need spot cleaning or gentle hand washing.
- Don’t overstuff or under-fill: If your pillow is too soft and saggy, it won’t look neat. If it’s too full, it might feel stiff and awkward.
Use a pillow insert that’s a little bigger than your cover. That way, your pillow looks nice and plump without being too hard.
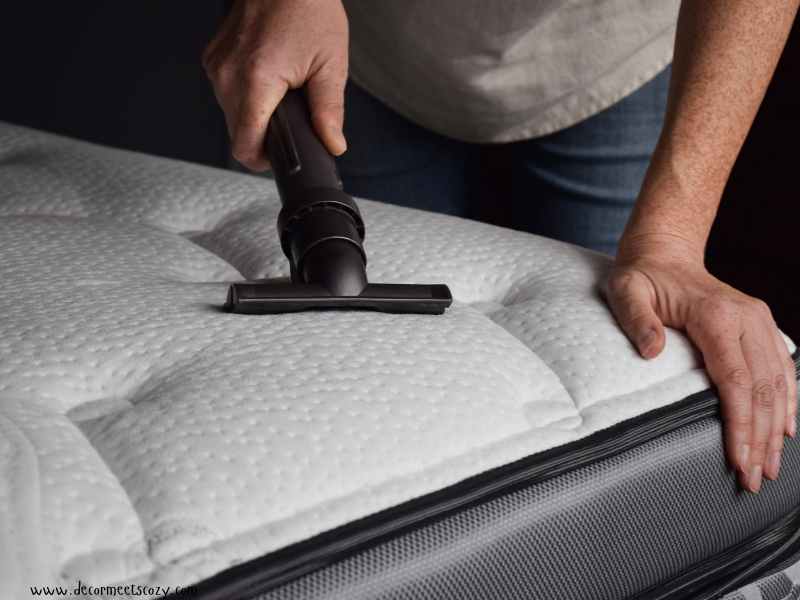
- Keep them fresh. Give them a good shake or fluff once a week.
And if they get musty or dusty, sprinkle a little baking soda on the cover, let it sit for 15 minutes, and then vacuum it off.
If you’re using your pillows in a high-traffic area or outdoors, consider using fabric protectant spray to keep stains and water damage at bay.
4. Materials To Use
If you’re learning how to make your own throw pillows and curtains, understanding the materials is a big part of getting the look, feel, and function you want.
From the pillow insert inside to the fabric and finishing touches outside, each choice makes a difference in the final result.
Let’s break it down.
-
Pillow Inserts: Types and Sizes
The insert is the heart of your pillow. It’s what gives it shape, fluff, and comfort. There are a few main types you’ll come across:
- Down: Made from the soft under-feathers of ducks or geese. Down inserts are super fluffy and luxurious but can be pricey and not ideal for people with allergies.
- Polyester: A budget-friendly, hypoallergenic option. These inserts hold their shape well but might not have that soft, sink-in feel.
- Foam: Think firm and supportive. Foam is great for decorative pillows you want to stand upright or lumbar pillows for back support.
- Cotton: Natural and breathable, cotton inserts are soft and comfortable, though they may flatten out quicker over time.
Always choose an insert that’s 1 to 2 inches larger than your pillow cover. This helps it look full and polished rather than saggy or limp.
-
Fabric Choices for Pillow Covers
The fabric you pick for your pillow cover sets the tone for the whole space. It affects how the pillow feels, how it looks, and even how long it lasts.
When figuring out how to make your own throw pillows and curtains, knowing your fabric is a must.
- Cotton: Breathable, affordable, and easy to clean. It’s a go-to for everyday pillows.
- Linen: Has a relaxed, airy vibe. It wrinkles easily but adds beautiful texture to any space.
- Velvet: Rich and plush. Perfect for adding warmth and elegance. Velvet makes a room feel cozy and upscale.
- Silk: Smooth and shiny, silk is best for decorative pillows you don’t use often. It’s delicate but gorgeous.
- Tweed or wool blends: Great for fall and winter looks. They add depth and a classic touch to rustic or traditional spaces.
When choosing your fabric, think about where the pillow will go. A family room pillow needs to be more durable than a purely decorative one on a guest bed.
And if you’re making matching curtains, choose fabrics that coordinate in color and texture, or even use the same fabric for both to tie the room together beautifully.
Other Materials to Consider
Sometimes it’s the small things that make your handmade pillows really stand out:
- Zippers or envelope closures: These make your pillow covers removable and washable. Envelope closures are great for beginners, while zippers give a cleaner, more polished look.
- Buttons and Embroidery: Add charm and personality to your pillows. You can hand-stitch designs or add a line of buttons for a cottage-style vibe.
- Trims and piping: These little details add a finished, store-bought look to your DIY project.
If sustainability matters to you, explore eco-friendly options like:
- Organic cotton
- Bamboo fabrics
- Recycled fibers or upcycled fabric from old clothes or curtains
Not only are these choices kinder to the planet, but they also add a unique story to your home decor.
5. How to Make Curtains at Home That Look Incredible
There’s something deeply satisfying about hanging up curtains you made yourself.
It’s not just about saving money or DIY pride, it’s about creating something that truly fits your space, down to the last detail.
If you’ve been looking for ways to personalize your home and learn how to make your own throw pillows and curtains, this part will walk you through the curtain-making process, in the simplest and most practical way possible.
-
Choosing the Right Fabric for Curtains
Picking the right fabric is the first and arguably most important step. Your choice will affect not only how the curtains hang, but also how much light and warmth they let in.
Here are some popular options:
- Cotton: Lightweight, breathable, and easy to work with. Ideal for living rooms, kitchens, or anywhere you want a casual, airy look.
- Linen: Has a more textured, natural look. Linen lets in light while still offering privacy, making it perfect for bedrooms or sitting areas.
- Velvet: Heavier and more luxurious. Great for insulating a room and blocking out light, especially in colder seasons or formal spaces.
- Synthetic blends: Durable and often wrinkle-resistant, these fabrics are practical for high-traffic rooms or humid areas like bathrooms.
When choosing fabric, always consider the function.
Want more privacy? Go with a thicker or lined option.
Want more natural light? Choose something sheer or semi-sheer.
And don’t skip the measuring, if you want that rich, full look, aim for your curtain fabric to be about 1.5 to 2 times wider than your window.
For the length, let it just brush the floor or puddle slightly for that extra touch of elegance and luxury.
Tools and Materials Needed for Making Curtains
Once you’ve picked your fabric, gather your tools. Making curtains at home is a lot easier when you’re prepared:
- Measuring tape
- Fabric scissors
- Sewing machine or hand-sewing kit
- Curtain lining
- Curtain rings, grommets, or hooks
- Iron-on hem tape
- Curtain rods
Having the right tools is key if you’re figuring out how to make your own throw pillows and curtains or just adding the finishing touches.
Step-by-Step Guide to Making Curtains
Now it’s time to put it all together. Whether you’re a confident sewist or a total beginner, these steps are beginner-friendly and adjustable:
- Measure your windows carefully – both width and desired length.
- Cut your fabric based on those measurements, adding an extra 2–3 inches on all sides for hems.
- Hem the edges: Fold each edge over once or twice, press with an iron, and sew (or use iron-on tape).
- Add pleats or gathers: These add visual interest. You can hand-pin them or sew in curtain tape to make it easier.
- Attach lining if you’re using one. This gives your curtains more weight, helps block light, and looks more professional.
- Add your hanging mechanism: Whether you sew on curtain rings, use clips, or add a rod pocket, this part depends on your preferred style.
Each step gives you more control over how your final curtains look and feel, something you just can’t get from store-bought ones.
-
Hanging Your Curtains
This is the part where it all comes to life, where your curtains stop being just fabric and start making your space feel intentional and beautiful.
- Tiebacks aren’t just practical, they can be a style statement too. If it’s a simple rope, a strip of the same curtain fabric, or even a bit of leather, it adds personality and helps frame your windows nicely.
- Tassels and trims might sound extra, but don’t overlook them! They can pull in textures or colors from the rest of your space like your rug, throw pillows, or even artwork and add that little “something” that makes it feel pulled together.
- Curtain rods matter more than people think. Mount them a bit higher than your window frame to make the room feel taller and more open.
And if you extend the rod a few inches wider on both sides, your curtains will fall more naturally and your window will look bigger even when they’re pulled open.
Even if you’re working on a budget, using rich-looking fabric, adding a lining, and letting your curtains pool just slightly on the floor can give you that high-end, custom feel.
6. How to Make a Pillow for Beginners
If you’ve ever looked at a cute throw pillow and thought, “I could totally make that, you absolutely can.
You don’t need to be a sewing expert or own fancy equipment to get started.
If you’re dipping your toes into crafting or looking for a weekend project, learning how to make your own throw pillows and curtains can be surprisingly doable, even for beginners.
Let’s slice it down into three simple, helpful parts.
Simple No-Sew Pillow Options
Not a fan of sewing? No problem. There are quick and easy no-sew pillow methods that still look amazing and hold up well.
Here’s a basic method using fabric glue or iron-on tape:
- Pick your fabric – cotton or fleece works great for beginners.
- Cut two equal squares or rectangles based on the size of your pillow insert or how big you want the pillow to be.
- Place the fabric pieces together, with the printed sides facing out (no need to flip inside out here).
- Use fabric glue or no-sew tape around three sides, leaving one side open.
- Let it dry fully, then insert your stuffing or pillow form.
- Seal the final side with more glue or tape.
You’ll be surprised at how neat and store-bought your DIY pillow can look.
This method is perfect for kids, classroom projects, or those just learning how to make your own throw pillows and curtains for the first time.
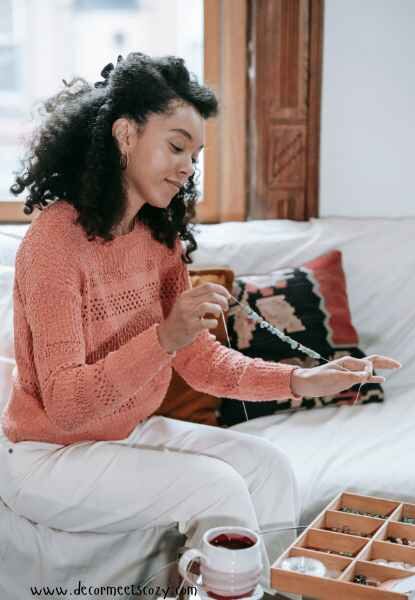
Basic Sewing Techniques for Pillow-Making
If you’re open to trying a little stitching, it opens up even more creative possibilities, and it’s easier than it seems.
Basic Hand Sewing Techniques:
- Running stitch: A simple in-and-out stitch. It’s great for beginners and perfect for seams.
- Whip stitch: Good for closing up pillows after stuffing. It wraps around the edge neatly.
- Backstitch: A bit stronger than a running stitch and great for pillow seams that get more pressure.
You can also try a beginner-friendly envelope pillow cover. It’s stylish, removable, and no zippers required.
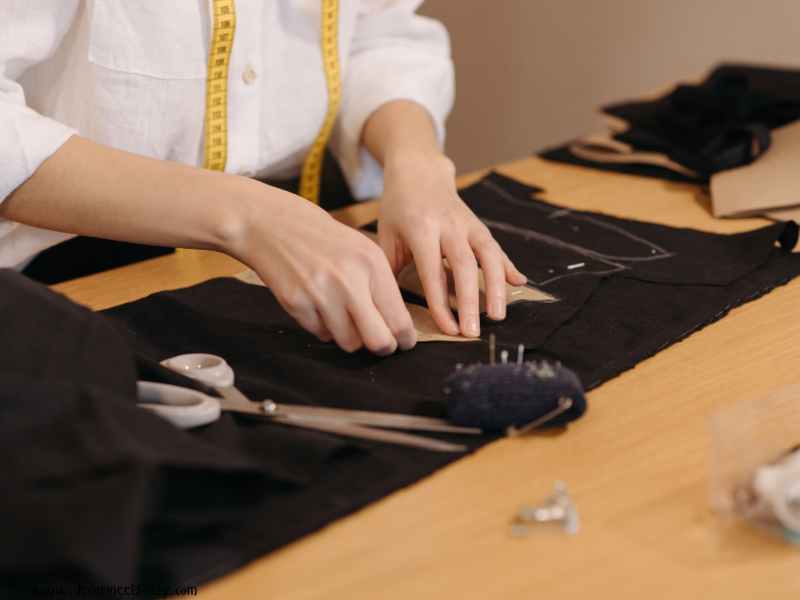
How to make one:
- Cut three pieces of fabric – one for the front and two overlapping pieces for the back.
- Hem the edges of the back panels where they’ll overlap.
- Lay everything down with the front piece facing up and the two back pieces overlapping (face down).
- Sew all around the edges, flip it right side out, and insert your pillow form.
This method is great for learning how to make your own throw pillows and curtains without too much pressure.
Plus, envelope covers are washable and super easy to change with the seasons or your mood.
Common Pillow-Making Issues
Even with simple projects, little hiccups happen. Here’s how to deal with them without getting discouraged:
- Crooked seams? Try using fabric chalk or a ruler to draw sewing lines before stitching.
- Uneven stuffing? Distribute the filling with your hands and gently massage the pillow for an even shape.
- Seams not holding? If you’re using glue, make sure it’s fully dry before inserting the stuffing. If sewing, double back on the corners to secure them better.
One of the biggest tips when learning how to make your own throw pillows and curtains is this: be patient with yourself.
Keep your workspace tidy, work in small bursts, and take breaks if you start to feel frustrated.
Mistakes are normal (even seasoned DIYers make them!), just part of the learning process.